
I encountered a nagging problem with all the Windows PCs on my network. Sometimes, they’d run just fine. Other times, they’d slow to a crawl. What used to take only a few seconds for my computer to accomplish would now take several minutes. During my research, I found that several other people encountered similar problems.
Many people identified the problem as an issue with the Windows Update Agent (WUA). You can read about it and the fix for it on Microsoft’s support site at support.microsoft.com/kb/916089/en-us. In all likelihood, however, if you’ve been updating Windows regularly, you already have the required fix.
I was able to track down my problem to software related to my HP printer. For some strange reason, the software was engaging my computer in a constant search for the printer, which was really bogging down both computers on my home network.
If you have an HP printer that you share on your network via a router and you’re experiencing very poor performance, this post may help you identify and fix the problem.
Identifying the Culprit
To find out what’s causing the slowdown, press Ctrl+Alt+Delete to display the Windows Task Manager shown below and click the Processes tab. Examine the list of processes for any process except “System Idle Process” that’s consuming a huge percentage of CPU resources. On my networked PCs, the process that was hogging the CPU was svchost.exe.
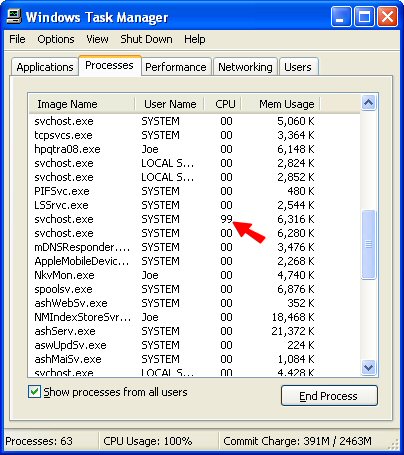
Svchost is part of Windows. Other software can call it into action. Several instances of svchost.exe were running, but only one may be causing a problem. Your next step is to find out which program running the problem instance of svchost is causing the problem.
Download a utility called Process Explorer and run it on my computer as shown below. This nifty utility displays a list of all the processes currently running, just like the Windows Task Manager does, but allows you to view more information about each process.
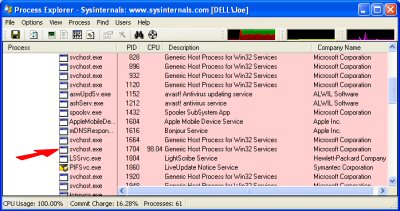
Double-click the process that’s consuming so much CPU usage to display a window with more information about the process, as shown below. This example shows information for HP Network Devices Support.

Changing a Service from Automatic to Manual
In the many discussions I read about this problem on other Web sites, I knew that I needed to change the service from automatic to manual in order to fix the problem. However, nobody really explained how to do that. Here’s how:
- Click Start and then Control Panel.
- Click Switch to Classic View.
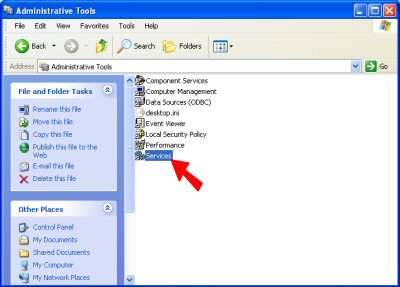
- Double-click Administrator Tools as shown below.
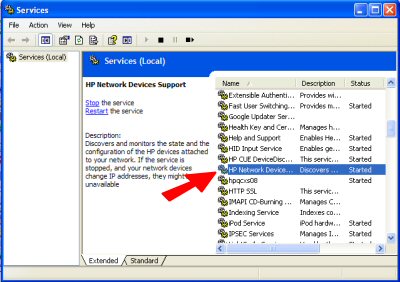
- Double-click Services, as shown below.
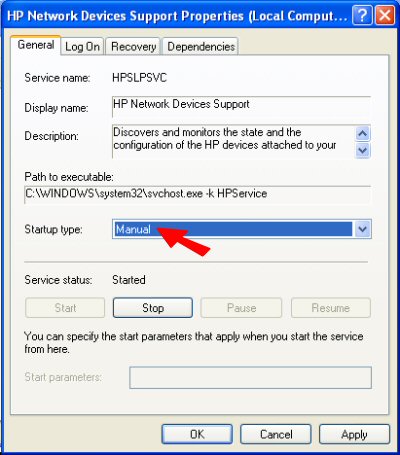
- Double-click HP Network Devices Support. Windows displays additional information about the service, as shown below, including the command used to run it.
- Change the Startup Type from Automatic to Manual and then click the OK button.

The Services window appears, as shown below. Note that it includes a couple HP services, including HP Network Devices Support.

Assigning Your Network Printer a Static IP Address
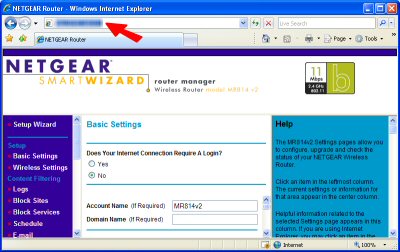
Unfortunately, now that you’ve essentially disabled the HP tool for locating the network printer on startup, Windows won’t be able to find your printer. To address this issue, assign your printer a static (fixed) IP address. The process for doing this differs depending on the router you’re using. I have a Netgear router, and the process goes something like this:
- Open your Web browser, type the IP address of your router, and press Enter. The IP address usually looks something like 127.132.0.1. (I blurred mine in the image below for security purposes.) Check the documentation that came with your router for information on how to access its settings.
- Login, if necessary, by entering your username and password. (Again, this should be included in your router’s documentation, unless you or someone else changed the router’s login settings.)
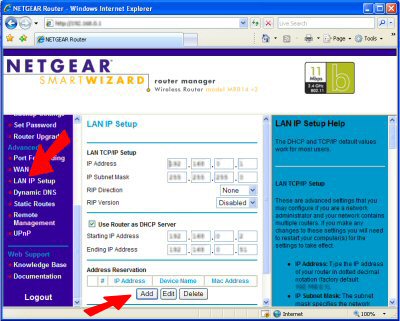
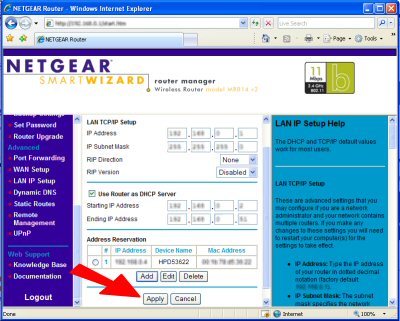
- Click the LAN IP Setup link to display the LAN IP Setup settings, where can assign a specific IP address to any device on the network, as shown below.
- Click Add to display a list of devices for which you can reserve a specific IP address.
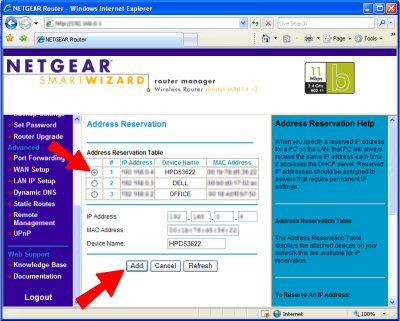
- Click the option button next to your printer and click Add, as shown below. This returns you to the LAN IP Setup page.
- Click Apply, as shown below.
Assuming everything goes as planned, the next time you restart your computer, you shouldn’t have a problem with svchost consuming all your CPU usage, and you should have no trouble printing.
Now, perform the same steps on your other networked computers.
Eternally grateful for this excellent advice re HP Network printer svchost consuming CPU resources.