
In this series, I’ve been teaching the basics of making a combination website/blog using Bluehost, WordPress, and Thesis. In Part I, I showed you how to get started with Bluehost, register your own domain name, and install WordPress. In Part II, I discussed WordPress themes and showed you how to transform the look and layout of your website/blog simply by selecting a different theme. In this part, I introduce WordPress plug-ins – small programs that add features to WordPress.
My Top 8 WordPress Plugins
On almost every website/blog I manage, I install the following WordPress plugins:
- Askimet: Included as part of the WordPress package, Askimet helps prevent comment spam.
- Multi-level Navigation Plugin: This adds a drop-down menu to your blog. Check out JoeKraynak.com/blog to see the menu in action.
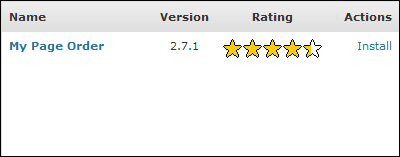
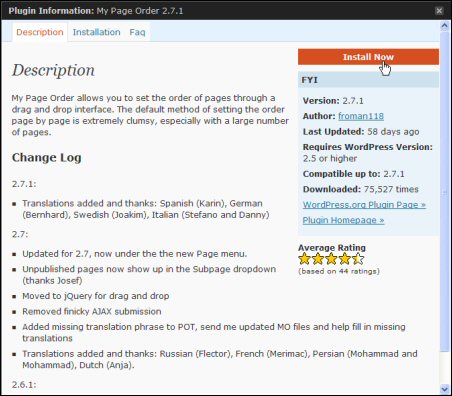
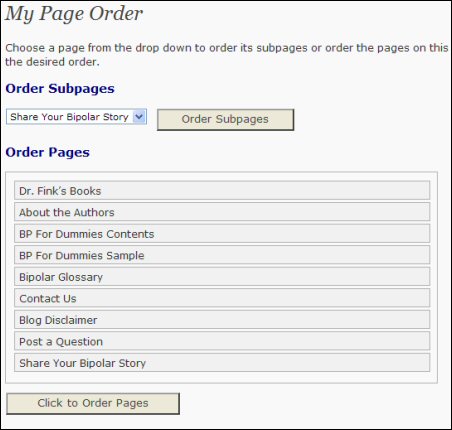
- My Page Order: Provides a tool that enables you to drag-and-drop pages to rearrange their order. (If you use the Thesis theme, this plugin is unnecessary, because the function is built right into the theme.)
- Peter’s Custom Anti-Spam: This plugin requires visitors to type a key word in order to post a comment. This cuts down considerably on comment spam.
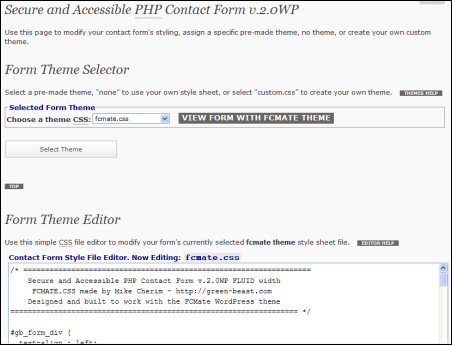
- Secure and Accessible PHP Contact Form: This allows people to contact me while protecting my email address. A lot of people place their email address right on their site, which makes it easy pickin’s for spammers. If you want people to contact you via email, I recommend you use a form like this one.
- Simple Trackback Validation: This plugin ensures that sites linking back to your posts actually have a verifiable link back to your blog. This prevents spam trackbacks.
- Thesis OpenHook: OpenHook makes it much easier to configure Thesis. If you don’t use the WordPress Thesis theme, however, you don’t need this plugin.
- SEO Title Tag: The SEO (Search Engine Optimization) Title Tag gives you the power to change the title of a page or post to anything you want. The title tag appears in the Web browser’s title bar when the page or post is open and is used by search engines (like Google and Yahoo!) to index the pages. The Thesis theme has its own title tag feature, along with other SEO tools, so if you’re using the Thesis theme, I recommend against installing or using the SEO Title Tag plugin.
Tip: When assigning a title tag, start with a word or phrase that best describes the content of the post or page. You can then follow up with other key words and phrases, such as the title of your blog.
Finding and Installing Plugins
Recent versions of WordPress have made it very easy to find and install plugins. Here’s what you do:
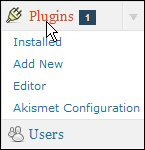
- Log in to WordPress.
- Scroll down the Dashboard and click Plugins.
- Scroll down the Plugins page to the Get More Plugins section.
- Click Plugin Browser/Installer.
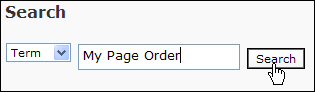
- Click in the search box, type the name of the plugin you’d like to install, and click Search.
- Click Install next to the plugin you’d like to install.
- Click the button to install the plugin and follow the onscreen instructions to complete the installation and activate the plugin.

You can browse a large collection of plugins by visiting the WordPress Plugin Directory. You can then download and install the plugin manually. However, I prefer to find the plugin I want and then follow the steps above to find and install the plugin from the WordPress Dashboard.
Configuring and Using Plugins
No two plugins are alike. Some, you simply install and activate, and they do their thing behind the scenes. Others require some additional work. For example, if you install the Secure and Accessible PHP Contact Form, you need to create a page on which the form will reside. All plugins I’ve encountered include some instructions to get you started.
If you’re not all that into reading instructions, you can always try poking around first. In most cases, when you install a plugin, some additional options appear in the WordPress Dashboard that allow you to configure or use the plugin. Click Plugins, Appearance, Tools, Pages, or Settings to look for additional options. In some cases, the plugin adds its own group of options to the Dashboard. Where you find options or settings for the plugins, you’re also likely to find more information about those options and settings.
If you’re a WordPress user, please post the names and descriptions of your favorite WordPress plugins here along with a brief explanation of why you like each plugin.
In my next post, I’ll show you how to create a static opening page for your website/blog combination and have your blog appear on a separate tab. With recent versions of WordPress, creating a combination website/blog is not as difficult as it sounds. See “Make a Website: Creating a Static Home Page in WordPress.”
Trackbacks/Pingbacks