
You can take several approaches to creating and managing your own site on the Internet, starting with low-end stuff like creating a free blog on WordPress.com to high-end stuff like hiring a professional designer to set up everything for you. In this series, I lead you down the middle of the road. This series assumes you want:
- Your own domain, like www.yourname.com with an email address like yourfirstname@yourname.com.
- A website or blog on your own, unique domain. (In this series, I show you how to use blogging software to create a combination website/blog.)
- The satisfaction of doing it yourself.
I’ve registered most of my domain names through Bluehost and have been using it as my hosting service for about three years. (A hosting service is where the files that make up your site will ultimately live on the Internet.) With Bluehost, you can…
- Register your own, unique domain name
- Create one or more websites or blogs
- Have up to 2500 email accounts for your domain name – like jack@companyname.com, jill@companyname.com, and kerry@companyname.com
- Create your own message boards
- … and more
To find out more, visit Bluehost, click the Tell Me More button, and then click the Demo Login… button. This logs you into a mock Bluehost Control Panel, were you can take Bluehost for a test drive. A tutorial window should pop up, providing additional details.
Register a Domain Name
Registering a domain name is pretty easy, assuming it’s not already taken, but you should spend some time deciding on a good name. When you’re trying to come up with a catchy name that plays well on the Web, check out “12 Rules for Choosing the Right Domain Name” by Rand Fishkin.
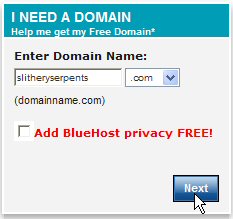
Several sites allow you to check domain name availability for free, including Whois.net, Internic.net, ajaxwhois.com, www.domjax.com, and Bluehost.com. When you find a name you like that’s available, register it. On Bluehost.com, here’s what you do:
- If you don’t have a Bluehost account, go to Bluehost.com, click Domain Check, and follow the onscreen instructions to register your domain and open a Bluehost account.
- If you’re already a Bluehost customer, log in to the Control Panel, scroll down to the Domains area, click Register Domain, and follow the on-screen instructions.
Create an Email Account
One of the first things you’ll want to do on Bluehost is create an email account. You can then access your mail via the Web by going to mail.yourname.com or you can set up your own email program, such as Outlook Express to fetch your mail for you. Setting up a new email account is a snap:
- Log on to Bluehost, if you’re not already logged on.
- Go to the Control Panel.
- Scroll down to the Mail section and click Email Accounts.
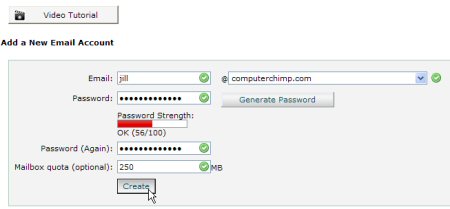
- Type the name you want to use in your email address and select the domain (if you have multiple domains in your account), as shown below.
- Type the password you want to use in the Password and Password (Again) boxes.
- Click Create. The new email account is added to your Current Accounts list.
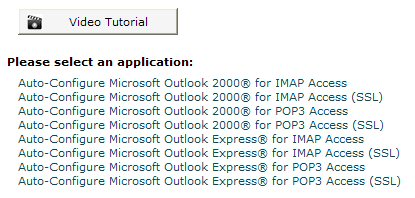
To configure Outlook or Outlook Express for sending and receiving email through the new account, scroll down to the Current Accounts list and click the Configure Mail Client Option. This opens a window that includes links you can click to have Bluehost automatically configure Outlook or Outlook Express. The required settings are also displayed, so you can configure your email client yourself, even if you happen to use something other than Outlook.
Install WordPress
The next thing you’re likely going to want to do on Bluehost is install WordPress – the program you’ll use to create and manage your blog/website.
Bluehost has several website creation and management tools, including Page Wizard Site Builder. People often waste a lot of time with these “Wizards” and wind up with mediocre sites to show for their efforts. WordPress (or better yet WordPress + Thesis) gives you much greater flexibility.
Before you proceed with the installation, consider where you’re going to have the WordPress files installed:
- The root directory: This is probably the best option if your site is going to consist of only one blog, only one website, or a combination blog/website as described in this series. By installing in the root directory, people can pull up your site in their browsers by entering www.yourname.com.
- A subdirectory: This is a great option if you plan on having your blog separate from your website, because it places all your blog files in a separate folder. To get to your site, however, people will need to tack the folder name onto the end of your domain name, as in www.yourname.com/blog. I used this option for FinkShrink.com, where the main website is on FinkShrink.com and the blog is on FinkShrink.com/blog.
- A subdomain: With a subdomain, you can install WordPress into a separate subdirectory (folder) and then create a subdomain, such as blog.yourdomain.com that people can enter in their browsers to go to your blog. (You can easily create a subdomain through the Bluehost Control Panel.)
Advanced: On JoeKraynak.com, I installed my blog in a separate folder and use a “redirect” to steer traffic from JoeKraynak.com to JoeKraynak.com/blog. In other words, if you try to go to JoeKraynak.com, you’ll end up at JoeKraynak.com/blog.
On Bluehost, installing WordPress is a snap with SimpleScripts. Here’s what you do:
- Log into Bluehost and go to the Control Panel, if you’re not already there.
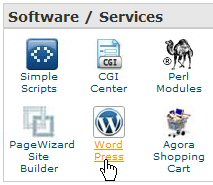
- Scroll down to Software / Services and click the WordPress icon.
- Follow the onscreen instructions to complete the installation.
Once WordPress is installed, you can visit your new blog by entering its address in your Web browser. It doesn’t look like much, but the Internet wasn’t built in a day, either.
To log in to WordPress, type its address in your Web browser followed by wp-login.php or wp-admin and press Enter. Enter your username and password, as shown below, and click Log In.
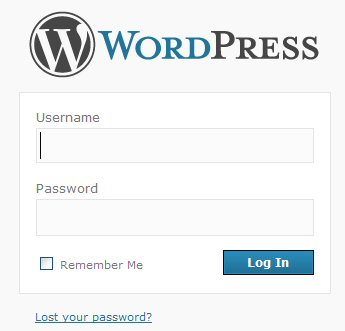
The WordPress Dashboard appears, which gives you access to everything you need to start posting entries and tweaking your blog layout and appearance.
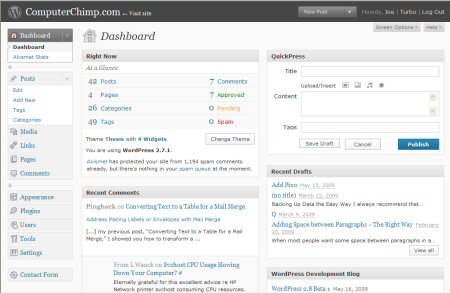
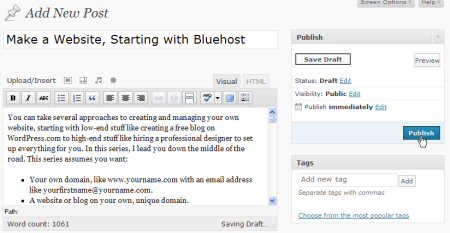
You can click the New Post button (upper right of the Dashboard) to display the screen below, which provides all the tools you need to compose, format, and publish a blog post.
Next time, I’ll discuss themes – the code that works behind the scenes to control the look and layout of your blog. You can completely revamp the appearance of your blog by changing themes – it’s almost as easy as changing your clothes! See “Make a Website, Changing the Look and Layout with a WordPress Theme.”
converse28
converse28