After installing WordPress, one of the first things you should do is make sure the blog title and tagline are correct and that the author name for your posts is exactly how you want it to appear. In this post, I show you how to access and change crucial WordPress settings:
- In your Web browser, type the address of your blog, followed by a forward slash and wp-admin and press Enter. For example, you might type yourdomain.com/blog/wp-admin and press Enter. The WordPress Dashboard appears.
- Click Settings.
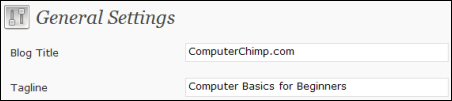
- Make sure the blog title and tagline are as you want them to appear in your blog header and click Save Changes. (Even if you use a header image instead of text, the blog title and tagline are important for search engines.)
- Under Settings, click Permalinks.
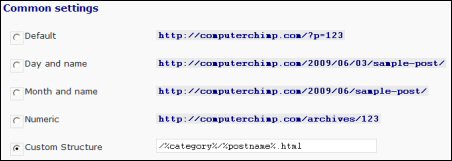
- Select Custom Structure, type /%category%/%postname%.html in the text box and click Save Changes. This displays the title of the blog post in its address rather than just a number. For example, instead of displaying http://www.yourdomain.com/?p=123 in the address bar, the address may appear as http://www.yourdomain.com/wildlife/save-rain-forests.html.
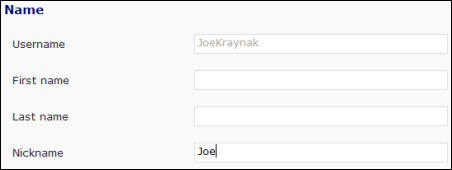
- Click Users.
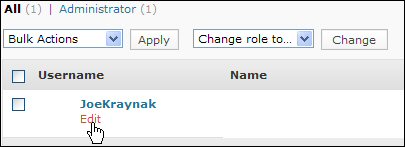
- Rest the mouse pointer on your username and click Edit.
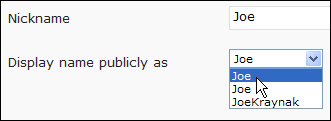
- In the Nickname box, highlight admin, type the name you want to appear whenever you post an entry, and click Save Changes.
- Open the Display name publicly as drop-down list and click the new nickname you created.
- Under Contact Info, make sure WordPress is set up to send notifications to the correct email address you want to use.
- Click Save Changes.